Laser profile scanners for real-time quality control in automated fibre placement – research into future composite manufacturing at the University of Bristol

A research project undertaken by the Bristol Composites Institute (BCI) at the University of Bristol used laser profile sensors from Micro-Epsilon to detect defects formed during the composites manufacturing process. By linking live laser sensor data with a convolutional neural network (CNN), the team at BCI can conduct real-time automated inspection of manufactured parts. This novel inspection technique provides great potential to improve efficiency and reduce waste in composites manufacturing.
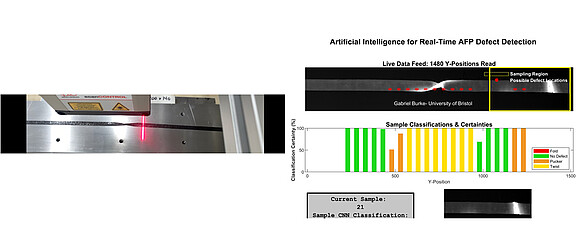
The team at BCI achieved this goal by embedding Micro-Epsilon’s sensors into a lab-scale automated fibre placement (AFP) system, which is a composite manufacturing method commonly used in the aerospace industry. The AFP method uses robotic arms to deposit layers of carbon fibre reinforced composites (CFRP) onto bespoke moulds. This process can create complex shapes at high speed. However, manufacturing-induced defects are inevitable during AFP. This degrades the strength of the final parts and creates a major waste problem, with defective parts having to be discarded in the worst-case scenarios. The system designed at BCI can locate these defects and classify them in real-time through the combined use of laser sensors and Artificial Intelligence (AI). The detection and classification process is computationally efficient enough to provide almost instant process monitoring.
The research team comprised of BCI intern Gabrial Burke and two supervising academics Dr. Iryna Tretiak, Lecturer in Composites Manufacture, and Dr. Duc H. Nguyen, Lecturer in Flight Dynamics and Control. Commenting on the project’s success, Dr. Tretiak said: “As we move towards Industry 4.0, we are trying to optimise the AFP manufacturing process. One possible solution is to implement artificial intelligence to help solve a variety of engineering problems. In this project, CNN is employed for pattern recognition purposes. Gabriel created a database of composite material images with defects and trained the AI system to recognise these and classify them accordingly.”
As Gabriel Burke explains: “The system can correctly identify and differentiate between three defects: fold, twist and pucker. It does so in real-time using a three-stage algorithm. The first stage is live data collection and pre-processing. The second stage is a sampling and image optimisation algorithm to produce a moving window of input images for the CNN. The third stage is defect detection and classification using the CNN. Due to this modular design, it is possible to modify each stage to fit the needs of other AFP applications. For example, the CNN can be retrained to look for other defects, or the sampler can be modified to collect images more or less frequently based on the scale of the part being manufactured.”

High performance sensor
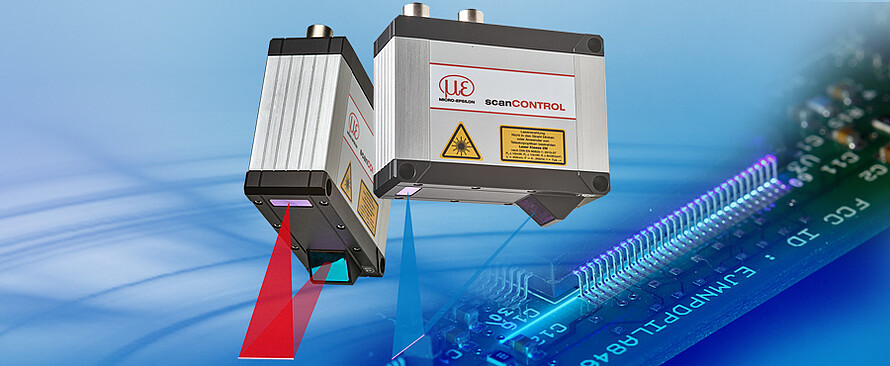
The scanCONTROL 3000-25 sensors used by the team at BCI is among the highest performing laser scanners in terms of its size, accuracy and measuring rate. The sensor has a compact housing with integrated controller, allowing fast integration into confined spaces. With a measuring range of 25mm, the sensor provides calibrated 2D profile data with up to 5.5 million points per second. A high resolution sensor matrix offers a resolution of 2,048 points per profile with an ultimate point distance spacing of just 12µm, allowing measurements of extremely fine surface/geometrical details.
Dr. Iryna Tretiak comments: “The Bristol Composites Institute has been using Micro-Epsilon sensors for quite some time now on a variety of different research projects. For this one, we chose the scanCONTROL 3000-25 sensor as it was fit-for-purpose and provided the resolution we needed, as well as the required distance to the target. The composite tape can be anything between 6mm and 13mm wide, so we needed a sensor with a field of view of around 25mm in order to ensure we could capture everything. The cost of the sensor was also within our purchasing budget. During the research, we received excellent technical support from Micro-Epsilon in terms of how to integrate and use the sensor, as well as advice on installation.”
“It was easy to integrate the scanCONTROL sensor into our machine. The control system for the machine was originally developed using LabVIEW. We used the freely downloadable scanCONTROL Configuration Tools software from Micro-Epsilon to extract the data into other software to create all the defect images. The software also allowed us to easily output the profile data into LabVIEW.”
Following the success of the initial proof-of-concept phase, the team at BCI has been awarded a Faculty of Engineering Strategic pump-priming fund to further develop this technology. As Dr. Iryna Tretiak concludes: “It’s critical to be able to detect defects during the AFP process. Normally, non-destructive techniques are used to test the parts after they’ve been produced, which makes it very difficult to mitigate any problems, resulting in parts being scrapped that don’t meet the manufacturing specification. Having the ability to automatically detect defects during production means we can react accordingly, save production downtime and reduce material waste. Furthermore, you can avoid manual errors as the machine operator doesn’t need to check for defects.”
For more information on the scanCONTROL laser profile sensors from Micro-Epsilon, please visit www.micro-epsilon.co.uk or call the Micro-Epsilon sales department on +44 (0)151 355 6070 or email info@~@micro-epsilon.co.uk