Jump directly to main navigation Jump directly to content Jump to sub navigation

High performance sensor technologies for robotics applications

ME467_Robot_header_900x320.png

Sensors play a key role in the use of robots in industrial processes. They enable robots to perceive their surroundings, position themselves accurately and carry out work steps precisely. Using different products and measuring principles, sensor technologies can be integrated into numerous robotics applications, says Glenn Wedgbrow, Business Development Manager at Micro-Epsilon UK.

Sensors have a decisive influence on efficiency and accuracy in robot-controlled production processes. They help robots to perform tasks such as assembly, inspection and quality control quickly and reliably, as they act as sensory organs for the robot. The use of robots reduces production costs and waste, while increasing product quality. Sensor specialist Micro-Epsilon serves almost all industries with its broad sensor portfolio and supports countless manufacturing processes.
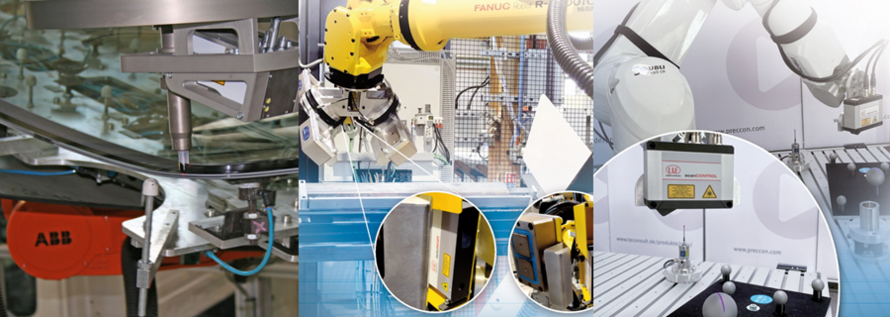
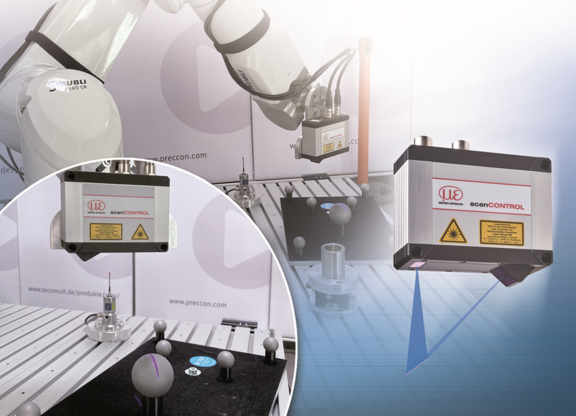
Calibration of robot axes

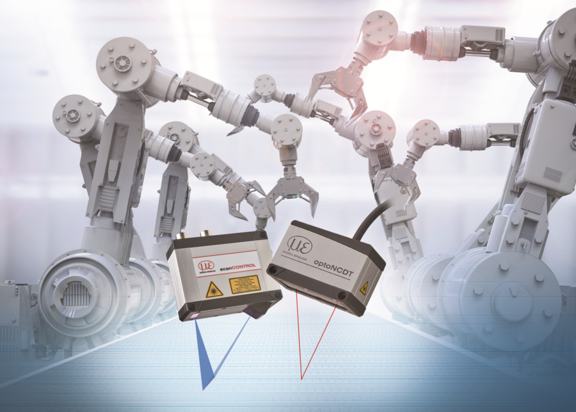
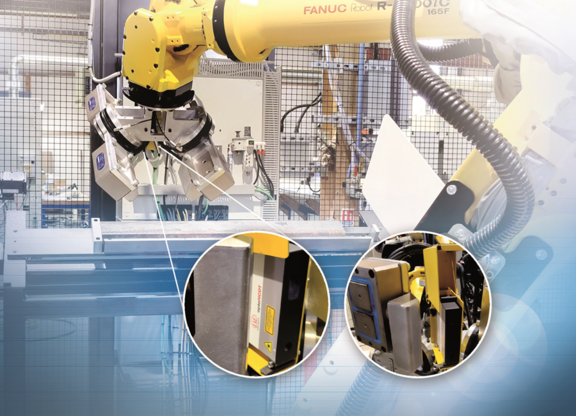
Micro-Epsilon sensors are already being used in the calibration of robot axes. To achieve fully automatic, independent calibration of robot cells, scanCONTROL laser scanners and optoNCDT laser triangulation sensors are used. These optical sensors enable continuous monitoring and restoration of the production process at the push of a button. The sensors are placed directly on the robot and measure onto a plate with reference targets. This system is operated together with special software from teconsult. Various Micro-Epsilon sensors can be directly integrated into the software. In addition, the solution can perform automated measurements, tests or corrections of the robot kinematics, the robot gripper and the periphery of the robot cell. The sensor technology is permanently integrated into the robot cell or used as a portable service tool.

3D scan before laser cladding

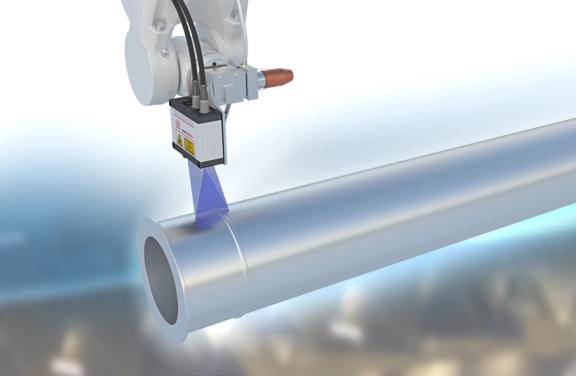
In laser cladding, a melt pool is created on the surface of the component and a new, pore-free layer is created by adding a new and powdered filler material. The core task of the sensors is to detect free forms and shape deviations before laser processing. A laser scanner from Micro-Epsilon's scanCONTROL series scans the components. If required by the component geometry, this is performed from several directions. Regardless of the reflection properties of the material, the sensor constantly provides reliable measurement values. The raw data is transferred directly to the customer’s software, merged into a 3D model and finally used for the path planning of the laser welding head. In addition, the nozzle can be placed at the correct distance from the surface and then guided along the calculated path. The result is a new, even and full surface. In contrast to a camera solution, laser profile scanners enable a 3D model to be created and are surface-independent in terms of contrast. The higher precision, as well as the various integration and processing possibilities of the acquired measurement data, also offer significant advantages in this application. Compared to tactile measurement, the cycle time required for non-contact measurement is also considerably shorter.

Print head positioning for concrete printing

Micro-Epsilon laser profile scanners are used for process control in concrete printing. These compact and lightweight scanners can be mounted directly on a robot and measure the concrete strand immediately after application. Due to large measuring ranges and the integrated signal calculation and evaluation, the complete strand is measured quickly and precisely and the evaluated measurement signal is transmitted directly to the control system. Video: https://www.youtube.com/watch?v=xa2UzGmbQHQ

Precise windshield assembly

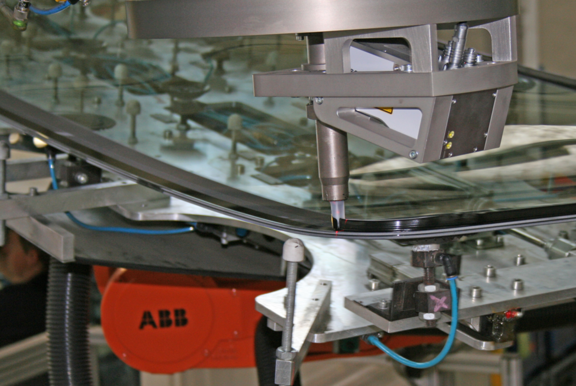
In the automotive industry, there are measurement tasks that require simultaneous detection of several measurement values or three-dimensional detection of measuring objects within short cycle times. For example, when installing a vehicle windshield, a scanCONTROL laser line sensor detects detailed distance values in all axes. In the installation process, the sensor is mounted onto the robot, which fits the window into the vehicle. When the windshield is placed on the car, the scanner detects the complete profile and vicinity of the windshield while all necessary values are determined with a single run in quick time. It can be determined whether the windshield is placed straight and centred or whether it fits perfectly in every plane. The result, in this case gap and flushness, are directly generated in the sensor head and output to the PLC.

Adhesive bead inspection

Another measurement task concerns the adhesive, which has already been applied before the windshield is fitted into the chassis. Therefore, a laser scanner is directly mounted onto the robot that applies the adhesive beading. Here, the sensor moves along the adhesive bead to create a 3D image. It reveals whether the adhesive quantity is sufficient, whether it is applied evenly and whether the bead is applied in the correct places. All detected measurement values are stored separately. If an error occurs in the process at a later point in time, these measurement values can be used for analysis purposes.

Strengths of the optical sensors

The strengths of the scanCONTROL laser scanners and optoNCDT laser triangulation sensors lie in their compact design, which means they can be easily integrated into robot-based applications, even where space is limited. Due to robust cabling, the sensors are suitable for the extreme rotational and torsional movements on the robot arm. They also have an integrated, highly sensitive receiver matrix, which enables measurements on almost all industrial materials, largely independent of surface reflection. Real-time quality control enables immediate intervention in production control. There is a choice of sensors with a red laser diode or with the patented Blue Laser Technology, which is generally used when the red laser light reaches its limits. This is the case, for example, with organic materials, wood, semi-transparent materials or red-hot glowing metals. The blue laser light can be focused more sharply on certain surfaces and enables high precision measurements there too. For applications where harsh environmental conditions prevail, Micro-Epsilon offers special accessories that protect the sensors. For welding applications, for example, a special housing is available with interchangeable protective screens. A special compressed-air purge system protects the optical components from dust.

Measuring principle of laser scanners

The laser profile scanner uses the triangulation principle for two-dimensional profile acquisition. It emits a laser beam that is expanded into a laser line. This hits the measuring object. The laser light is reflected by the object surface and projected onto a highly-sensitive receiving matrix in the sensor. In addition to distance information (z-axis), the controller also uses this camera image to calculate the position along the laser line (x-axis). These measured values are then output in a two-dimensional coordinate system that is fixed with respect to the sensor. In the case of moving objects or a traversing sensor, it is therefore possible to obtain 3D measurement values.

Measuring principle of laser triangulation sensors

The laser triangulation principle is based on a simple geometric relationship. A laser diode transmits the laser beam onto the measuring object. A lens focuses the reflected rays onto a CCD/CMOS array. The distance to the target object is determined via a triangular relationship between the laser diode, the measurement point on the object and the image on the CCD line. The measurement resolution reaches a fraction of a micrometer.

For more information, please visit www.micro-epsilon.co.uk or call the Micro-Epsilon sales department on +44 (0)151 355 6070 or email info@~@micro-epsilon.co.uk

Further Information