Jump directly to main navigation Jump directly to content Jump to sub navigation

High precision sensors ensure accuracy and quality of 3D printed parts

ME471_3d_print_header.png

As potential applications for additive manufacturing increase, 3D printing machine makers rely on high precision non-contact sensors to measure a range of parameters such as position, displacement, tilt and temperature, as well as performing CAD comparisons of the printed components, says Glenn Wedgbrow, Business Development Manager at Micro-Epsilon UK.

3D printing, also known as additive manufacturing, originated as a tool for rapid prototyping, though it has now evolved to encompass a number of different applications, including visual and functional prototypes, tooling aids and end-use parts.

Depending on the specific measurement application on a 3D printing machine, the appropriate measuring sensor technology should be selected. These technologies include capacitive, eddy current, inductive (LVDT), confocal, draw-wire (string pot), laser triangulation, and laser profile scanners. Here are some application examples where Micro-Epsilon non-contact sensors are used in 3D printing machines:
Monitoring the tilted squeegee

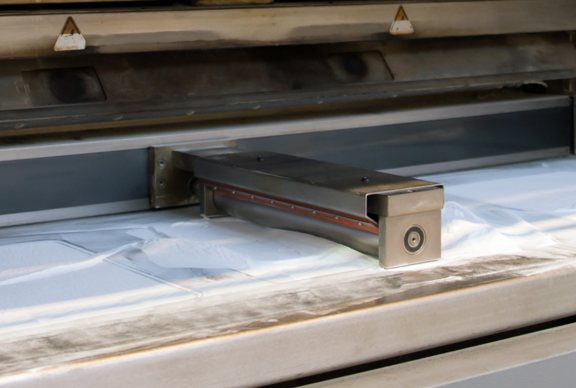
Capacitive displacement sensors are used to monitor the position of the tilted squeegee. Two synchronised sensors measure, with high resolution, both ends of the squeegee to provide exact information about its tilt angle. This is to ensure that the powder bed has been pulled off evenly and that the build layers are consistent.

Orientation and positioning of the build platform

With selective laser sintering, the build platform is lowered after each melting cycle by a defined value which corresponds to the required Z resolution. Inductive displacement sensors based on eddy currents monitor this build platform in order to allow the print head to be aligned in parallel.

High precision sensors for print head tracking

Precise positioning of the print head is particularly necessary for 3D printing of complex components, as well as for PCB printing. Confocal sensors are used to check positioning with sub-micrometre accuracy. These measure the distance with the highest precision and at the same time have a high measuring rate. This also allows dynamic pressure processes to be controlled.

Detection of platform tilt and position

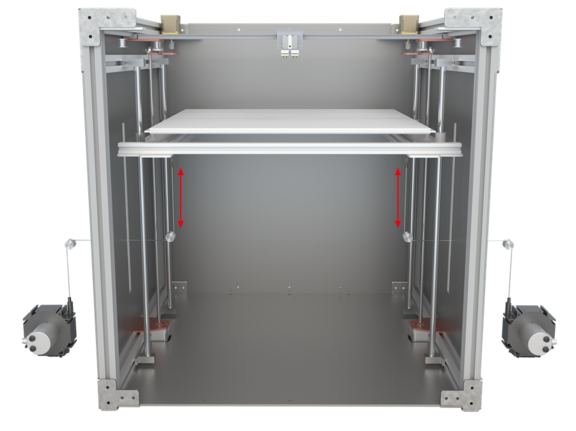
Draw-wire displacement (string pot) sensors are used to continuously check the tilting of girder platforms. The sensors are mounted outside the pressure chamber. The measuring wire is guided into the pressure chamber via deflection pulleys. Therefore, this design is also suitable for environments with high temperatures and dust formation. The compact sensors have large measuring ranges and can therefore detect the tilt even if the position of the platform varies greatly.

Temperature monitoring of the powder bed

During laser sintering with CO2 lasers, thermal imaging cameras monitor the powder bed. The thermoMETER TIM thermal imaging cameras from Micro-Epsilon can be equipped with different lenses optimised for the respective measuring field. The high thermal sensitivity enables detection of the smallest temperature deviations. These high speed cameras also capable of capturing dynamic printing processes. Depending on the temperature to be measured, thermal imagers with specific detector wavelengths and/or filters are used to ensure that no damage is done to the imager during the welding process.

Heat distribution on 3D printed parts

To check the heat distribution of the printed components, thermal imaging cameras are used. These record the two-dimensional heat distribution from a safe distance and provide information on the stability of the joints and structures. The cameras can be used to monitor metal as well as plastic parts.

Temperature of the powder bed and carrier platform

In certain 3D printing processes, the powder bed is heated to ensure defined processing temperatures. Miniature thermoMETER CT pyrometers from Micro-Epsilon are used to monitor the temperatures. The sensors are mounted above the bed and record the temperature regardless of how far away the powder bed is. The sensors measure with high reliability even at high ambient temperatures in the installation space.

Print-head calibration in Z-axis

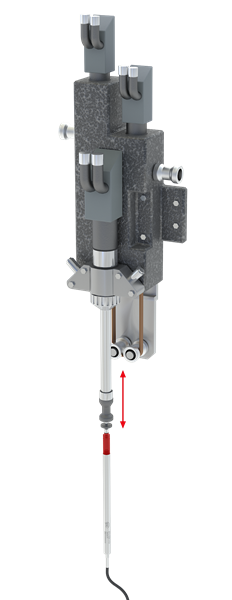
To obtain repeatable print results, the Z-axis position of print heads is calibrated fully automatically. For this purpose, the print head moves to a defined position and lowers in the Z-axis direction. An inductive LVDT gauge records the Z-axis movement with high accuracy. The determined distance data is taught-in for regular calibration of the Z-axis position of the print head.

Print head positioning and focal point control

With printing processes, the exact height of the print head is a crucial factor for the quality of the final product. High-speed distance measurement against different material surfaces and reliable edge detection enable a fast readjustment process.

Robot path calculation in repair welding processes

In order to calculate the robot path, scanCONTROL laser scanners determine the areas that need to be welded. Providing a high profile resolution and profile frequency, these laser scanners enable quick repairs.

High-precision 3D measurement in final inspection

To check the dimensional accuracy of printed components, 3D surface scanners are used. These generate high-resolution snapshots of the components in a very short timeframe. The powerful 3DInspect software from Micro-Epsilon evaluates and outputs the point clouds.

3D scan prior to laser cladding / laser deposition welding

Laser profile scanners are used to detect the contour during laser cladding. These scanners detect the exact contour of the object before the weld is deposited. The 3D data is used to exactly determine the guidance of the weld head.

CAD comparison of the printed component

In order to monitor their production quality, printed components are inspected using Blue Laser scanners. The components are moved past the scanners with a traversing unit. A 3D image is produced from the laser profiles and then compared with the CAD data.

High-precision 3D measurement in final inspection

To check the dimensional accuracy of printed components, 3D surface scanners are used. These generate high-resolution snapshots of the components in a very short timeframe. The powerful 3DInspect software from Micro-Epsilon evaluates and outputs the point clouds.

For more information, please visit www.micro-epsilon.co.uk or call the Micro-Epsilon sales department on +44 (0)151 355 6070 or email info@~@micro-epsilon.co.uk

Further Information